Appearance
Previews
Images outputted by nodes can always be previewed in real-time.
Floating Previews
When you select a node that outputs an image a preview is always shown automatically. By default is it shown as a floating panel on the bottom-right corner of the canvas:
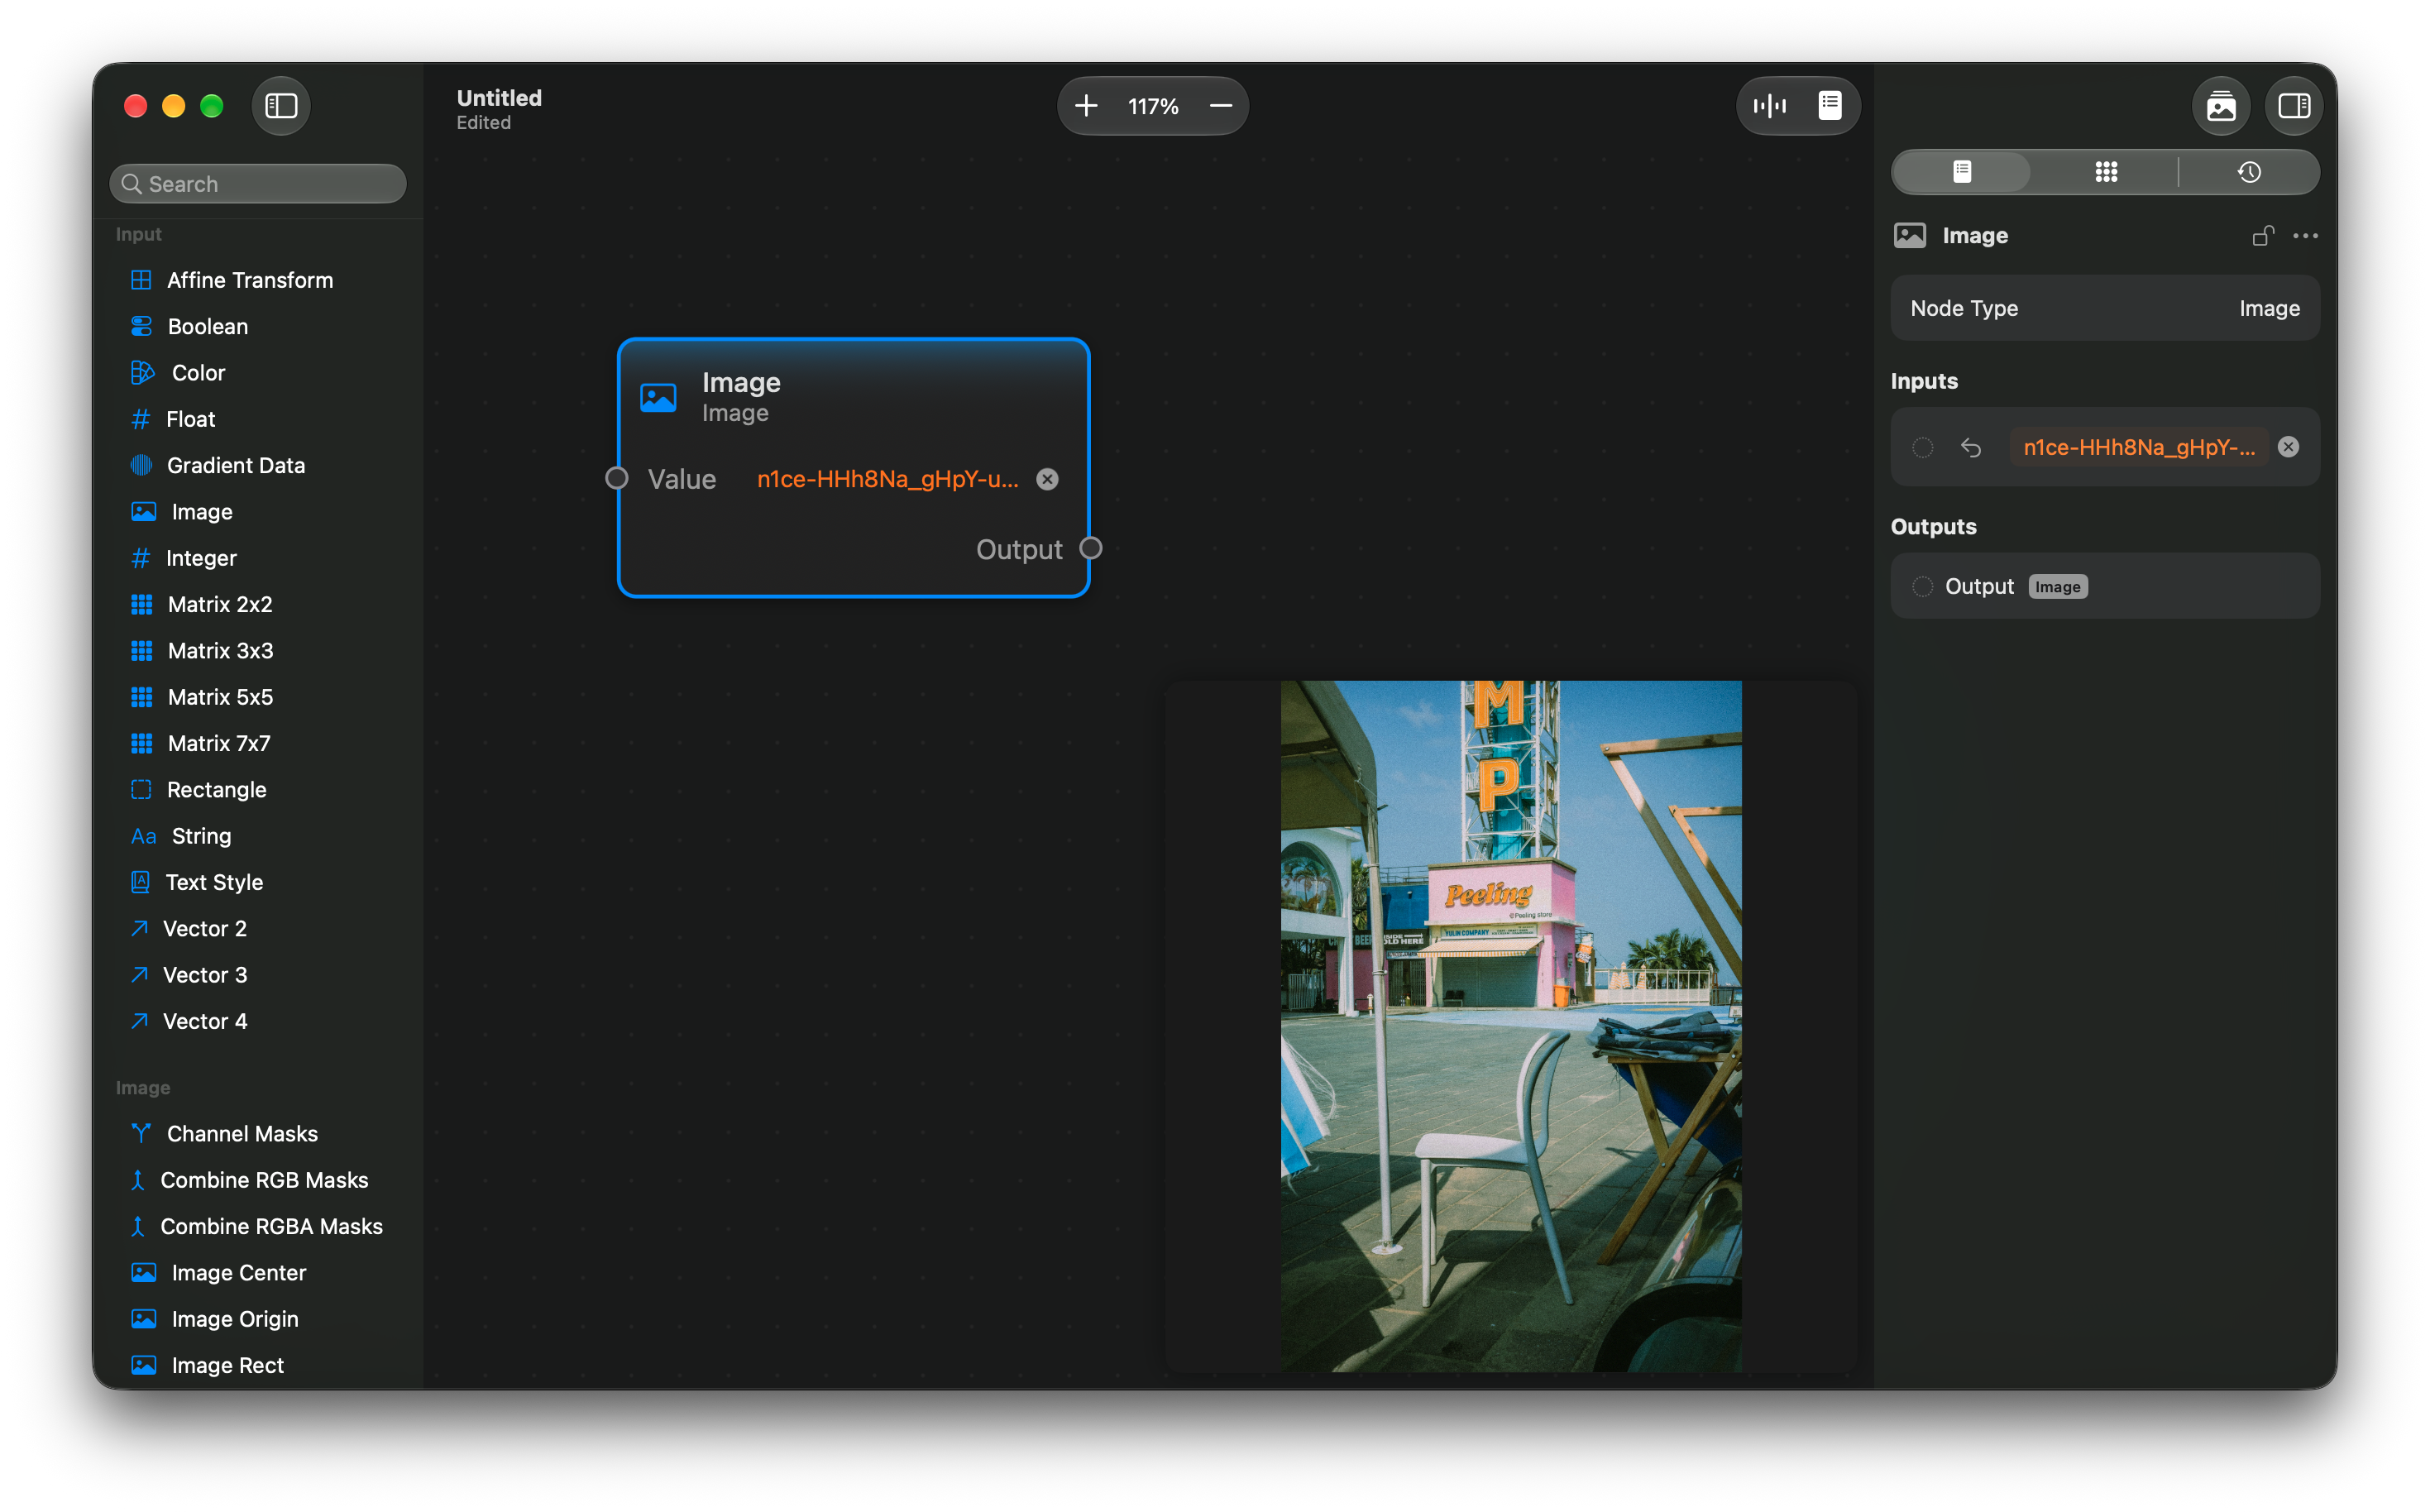
You can change the default behavior of previews in the Settings Window.
The floating preview panel can be resized and dragged around to be positioned in any of the four corners of the canvas:

When the mouse is placed over the float preview, an overlay with various controls is displayed:
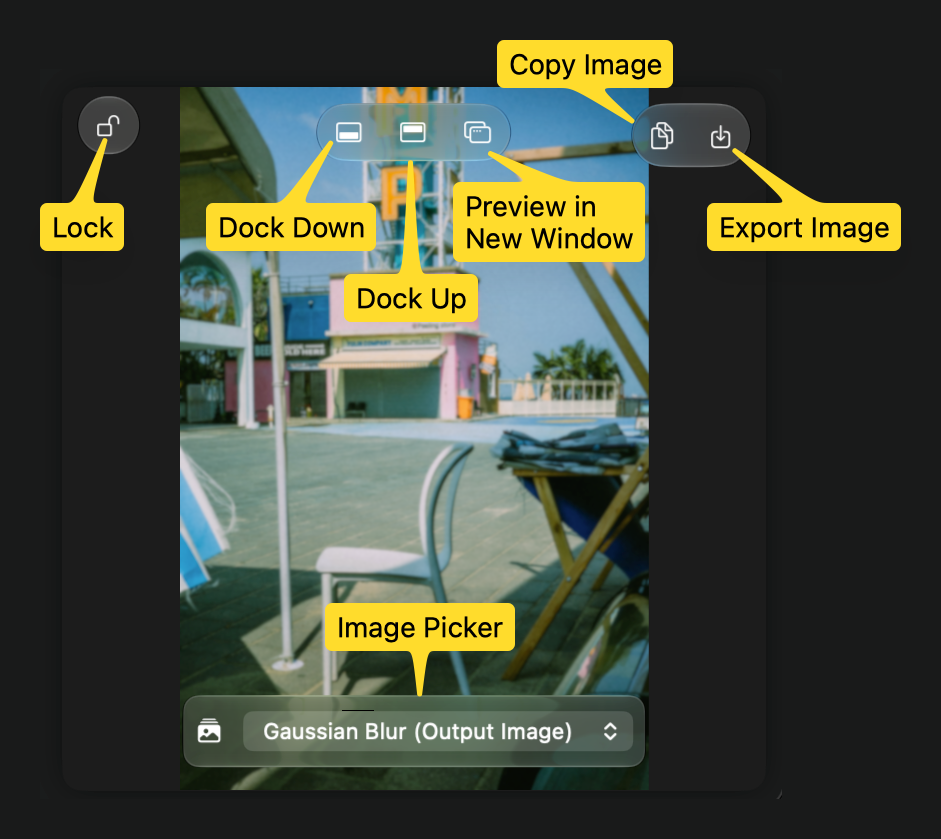
Here is a breakdown of these controls:
- Lock: This button toggles the preview lock. When the preview is locked, the current image will stay open in the preview even if the node is no longer selected.
- Dock Down: Will dock the preview to a fixed panel on the bottom of the canvas area.
- Dock Up: Will dock the preview to a fixed panel on the top of the canvas area.
- Preview in New Window: Will open a new Preview Window with the current image. If a preview window for this image is already open, will only focus the window.
- Copy to Clipboard: Will copy the current image to the clipboard.
- Export Image: Will open the Export Image dialog.
- Image Picker: When more than one node is selected, or if a node has more than one output image, you can pick which image to preview in this dropdown button.
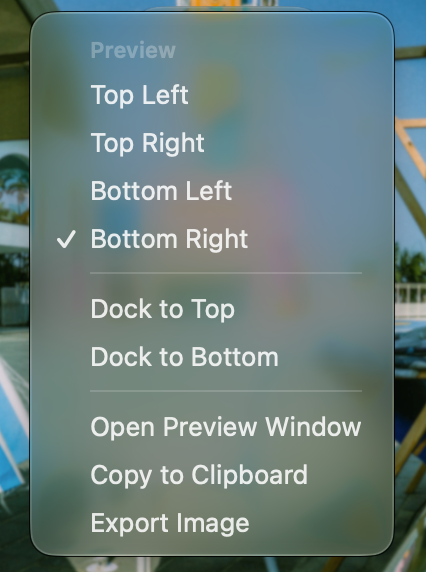
These actions as well as the positioning of the floating panel can also be accessed in the context menu of the panel, and on the app menu:
Docked Preview
Docked previews have a fixed position, either on the bottom or on the top of the canvas. In contrast to previews in floating panels, images in docked previews can be zoomed in and out and panned.
You can zoom in and out using the mouse scroll wheel or using a pinch gesture on the trackpad.
You can move and pan the image middle-click dragging with the mouse or by two-finger scrolling on a trackpad.
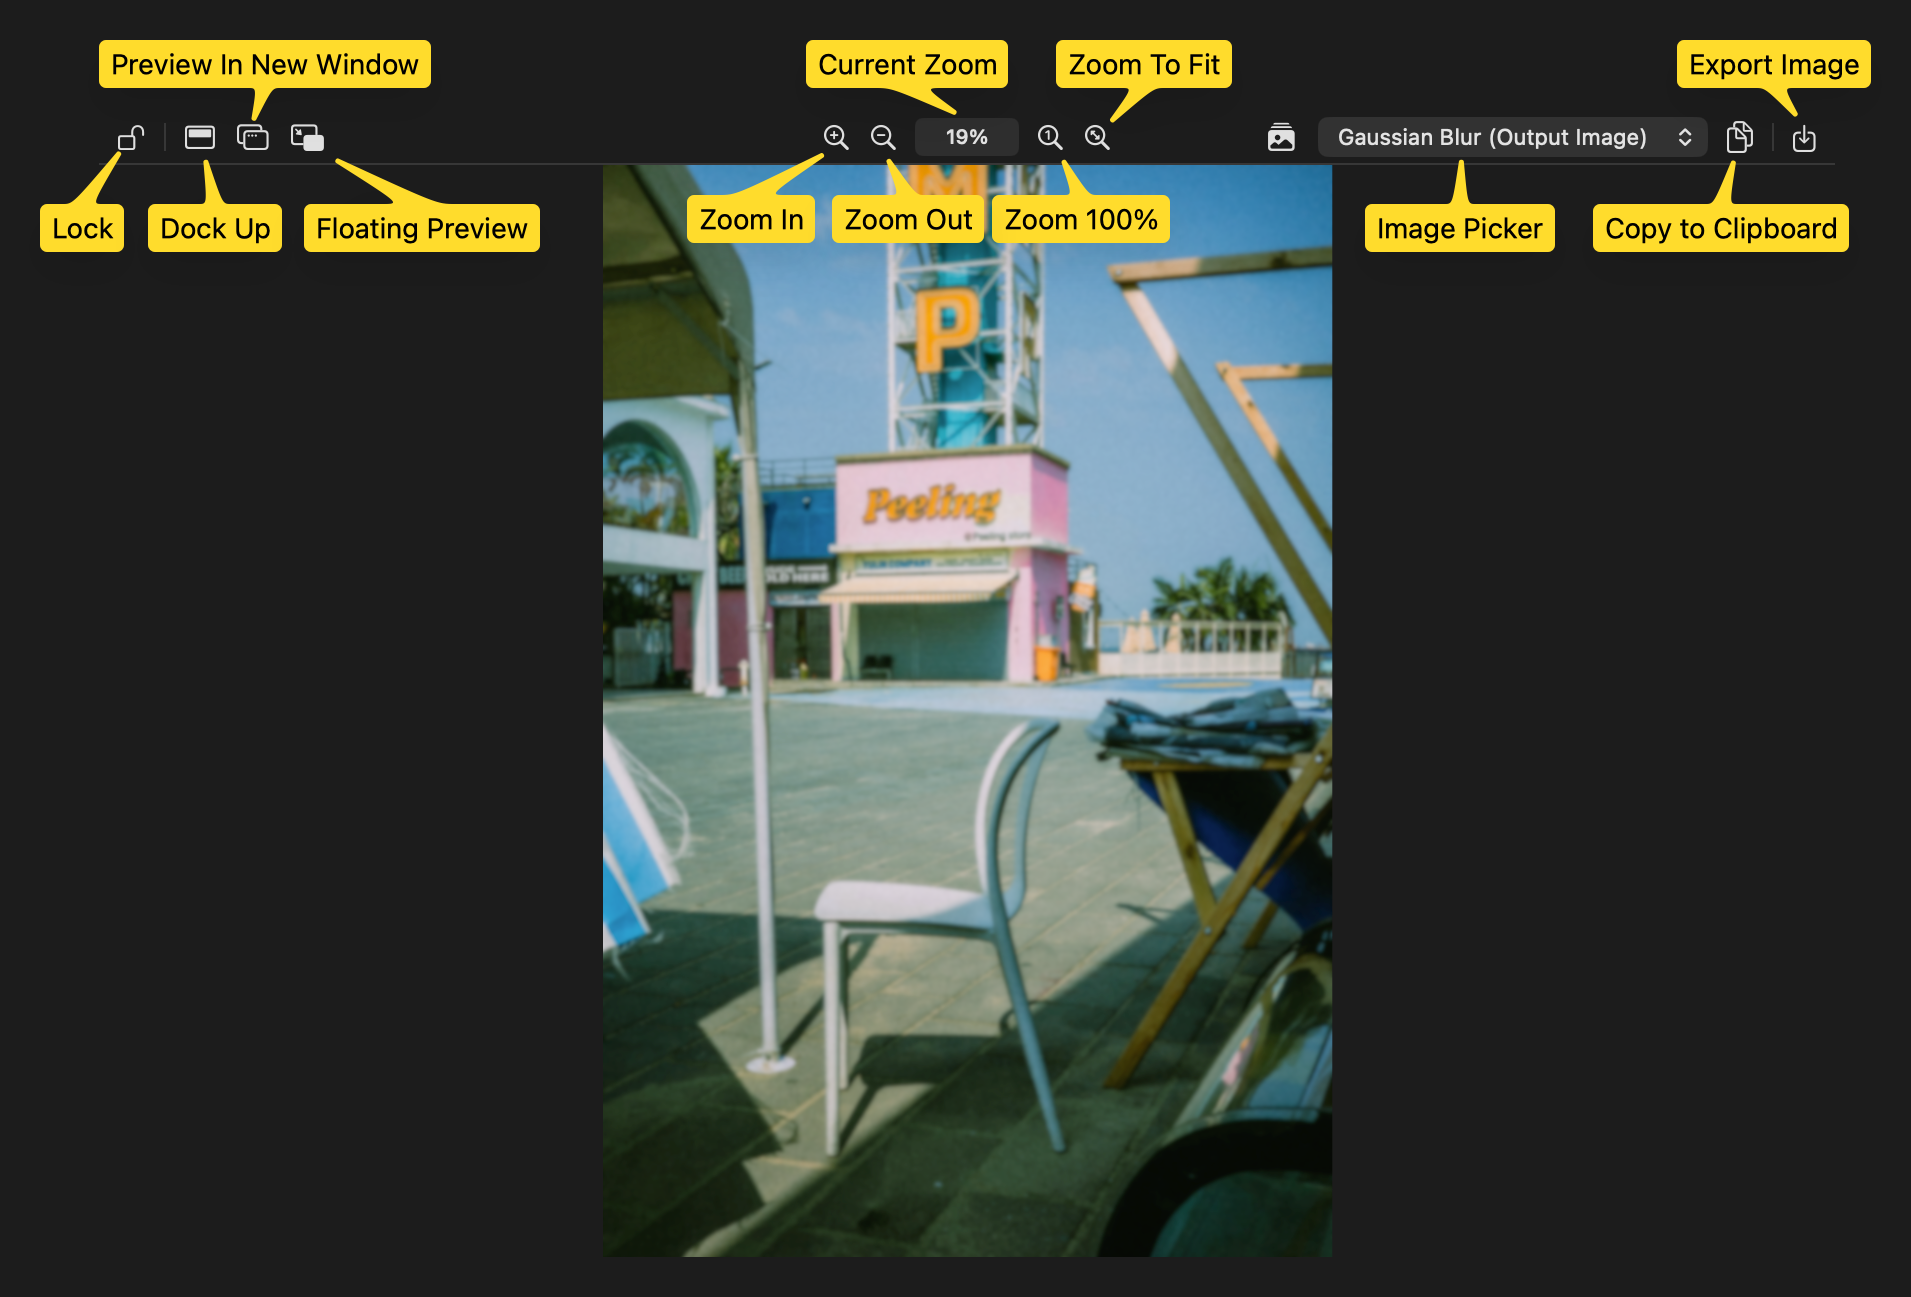
Here is a breakdown of the functionality available in the docked preview's toolbar:
- Lock Button: Serves the same functionality as in the floating panel, locking the preview to the current image.
- Dock Up/Down: When the preview is docked down, this will be a Dock Up button. When the preview is docked up this will be a Dock Down button.
- Preview in New Window: Will open a new Preview Window with the current image. If a preview window for this image is already open, will only focus the window.
- Floating Preview: Will undock the current preview into a floating panel.
- Zoom In: Will increase the current zoom level.
- Zoom Out: Will decrease the current zoom level.
- Current Zoom Level: Displays the zoom level.
- Zoom 100%: Will set the zoom to 100%, showing the image in its original size.
- Zoom To Fit: Will set the zoom to a level where the image will fit the preview viewport.
- Image Picker: When more than one node is selected, or if a node has more than one output image, you can pick which image to preview in this dropdown button.
- Copy to Clipboard: Will copy the current image to the clipboard.
- Export Image: Will open the Export Image dialog.
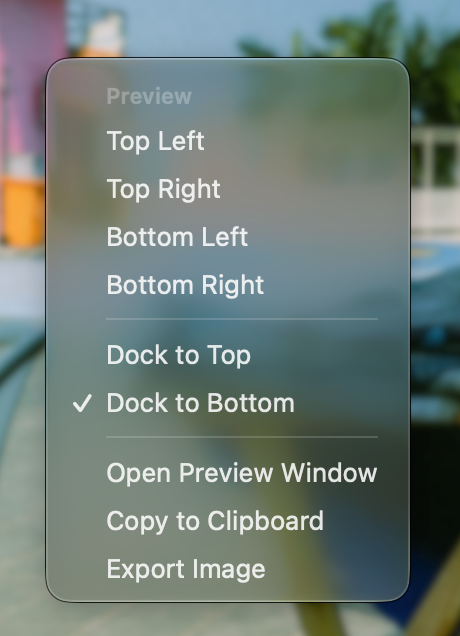
These actions can also be accessed in the context menu of the panel, and on the app menu:
Preview Window
Any preview can be opened in a separate Preview Window.
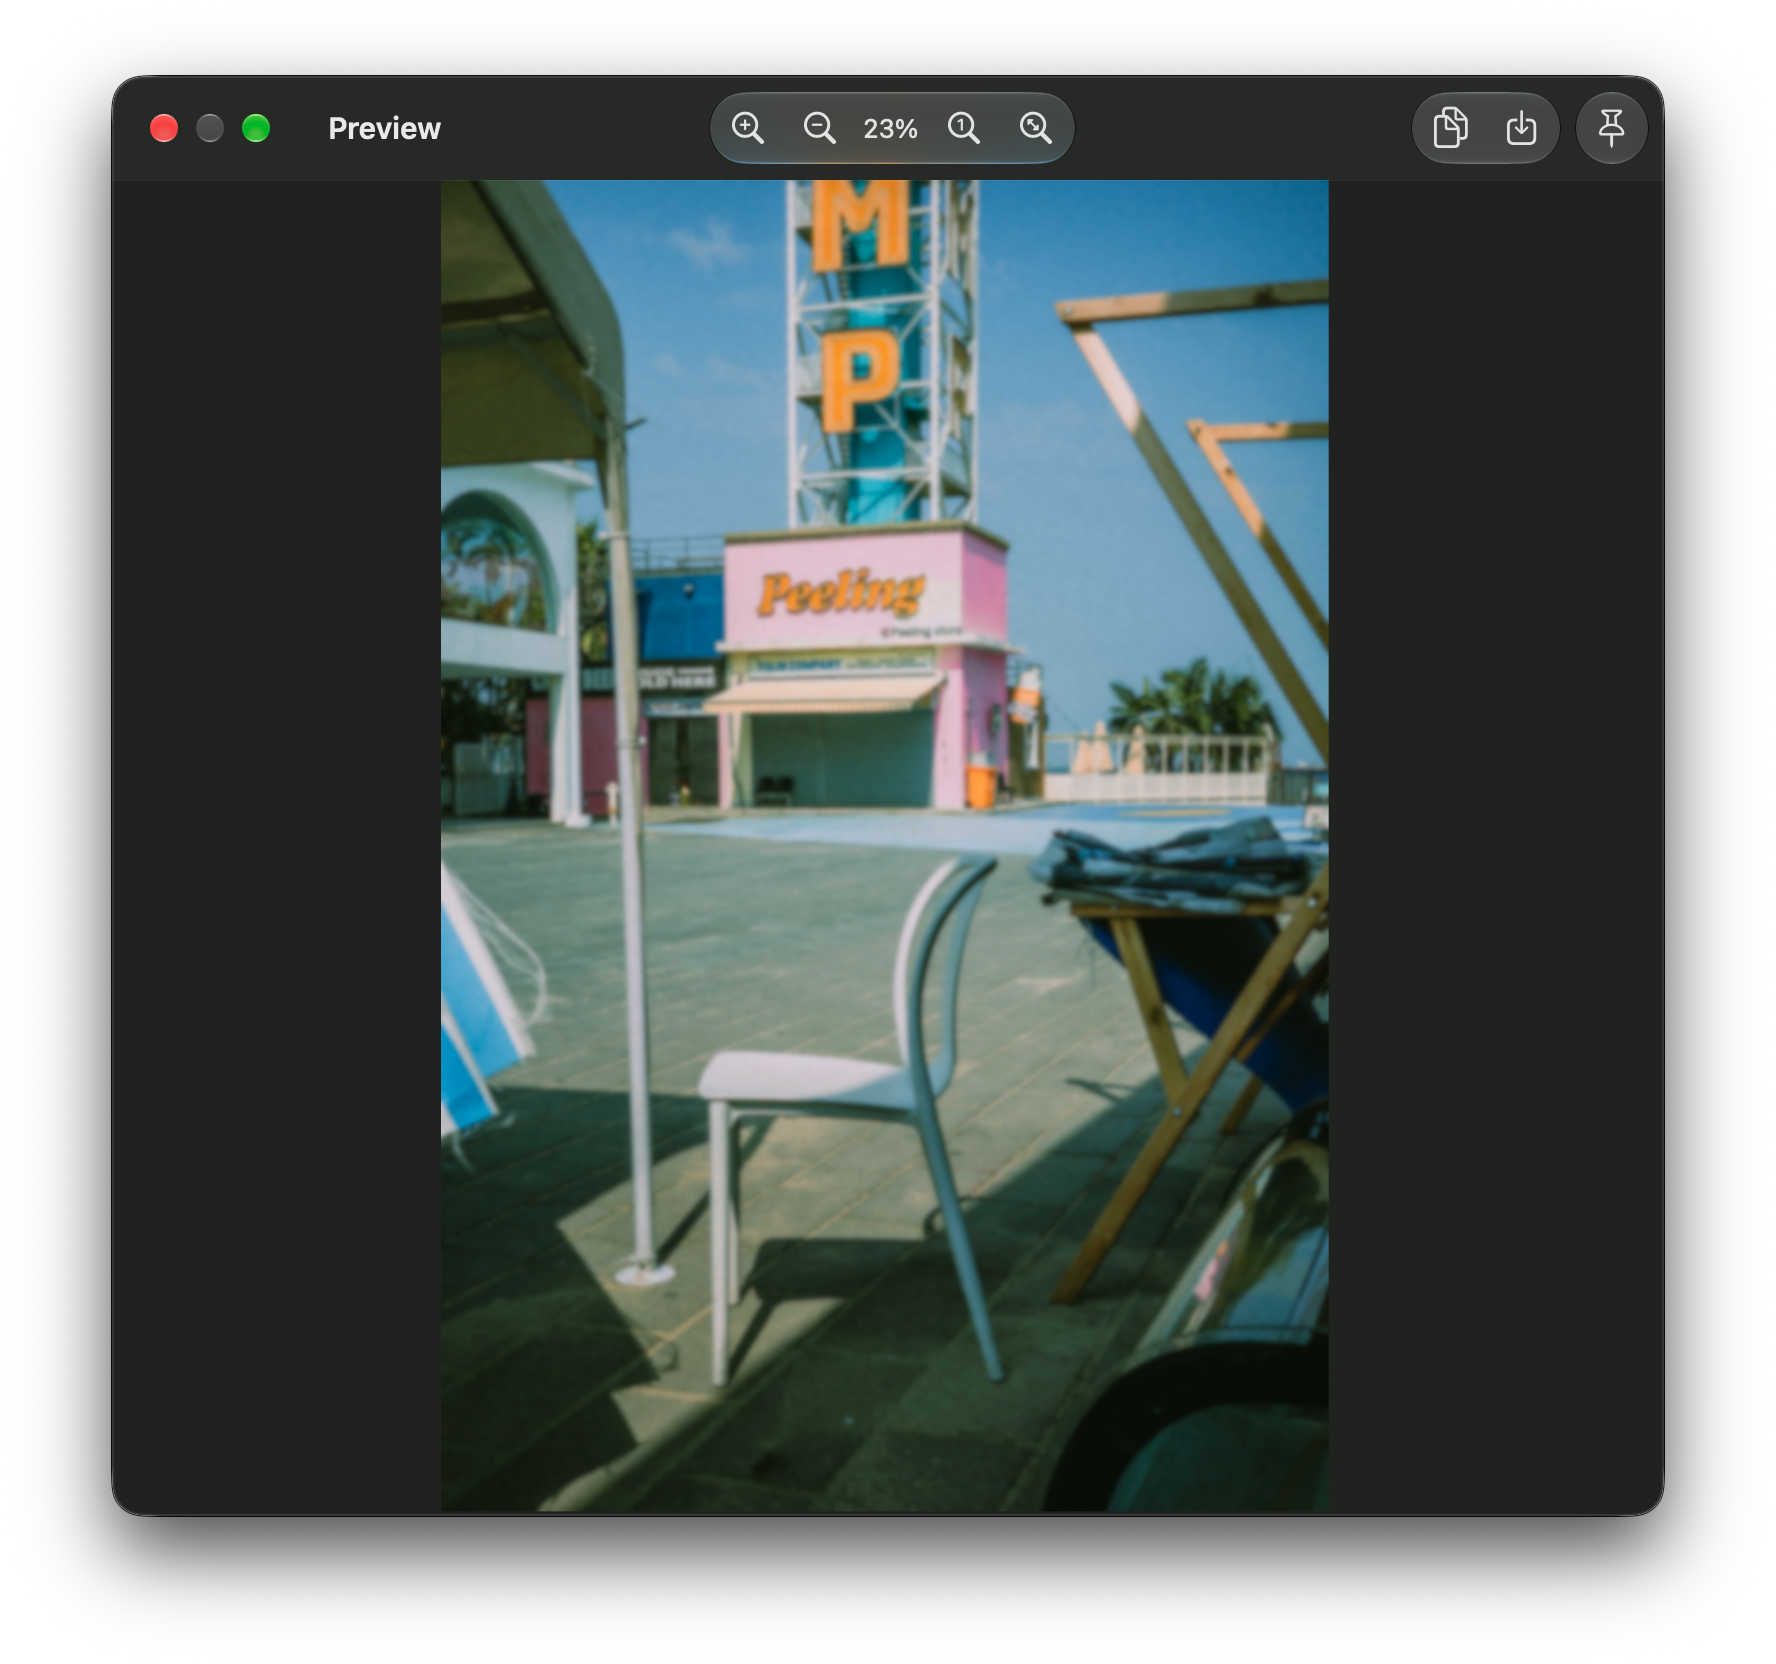
Here is a breakdown of the functionality available in a preview window's toolbar:
- Zoom In: Will increase the current zoom level.
- Zoom Out: Will decrease the current zoom level.
- Current Zoom Level: Displays the zoom level.
- Zoom 100%: Will set the zoom to 100%, showing the image in its original size.
- Zoom To Fit: Will set the zoom to a level where the image will fit the preview viewport.
- Copy to Clipboard: Will copy the current image to the clipboard.
- Export Image: Will open the Export Image dialog.
- Pin Window: Will pin the window so that it will always be on top of other open windows.